How to Register Your Brand on Blinkit
Quick commerce is revolutionizing retail, and Blinkit has emerged as a dominant player delivering groceries and essentials in 10-20 minutes.
For small and medium business owners, this presents an unprecedented opportunity to reach customers who demand instant gratification.
However, the Blinkit onboarding process can seem daunting without proper guidance.
This comprehensive guide addresses the most common pain points SMB owners face: unclear document requirements, delayed approvals, complex commission structures, and lack of transparency in the registration process.
You'll learn exactly how to navigate Blinkit's seller onboarding system and start selling within weeks, not months.
How Do I Start the Blinkit Seller Registration Process?
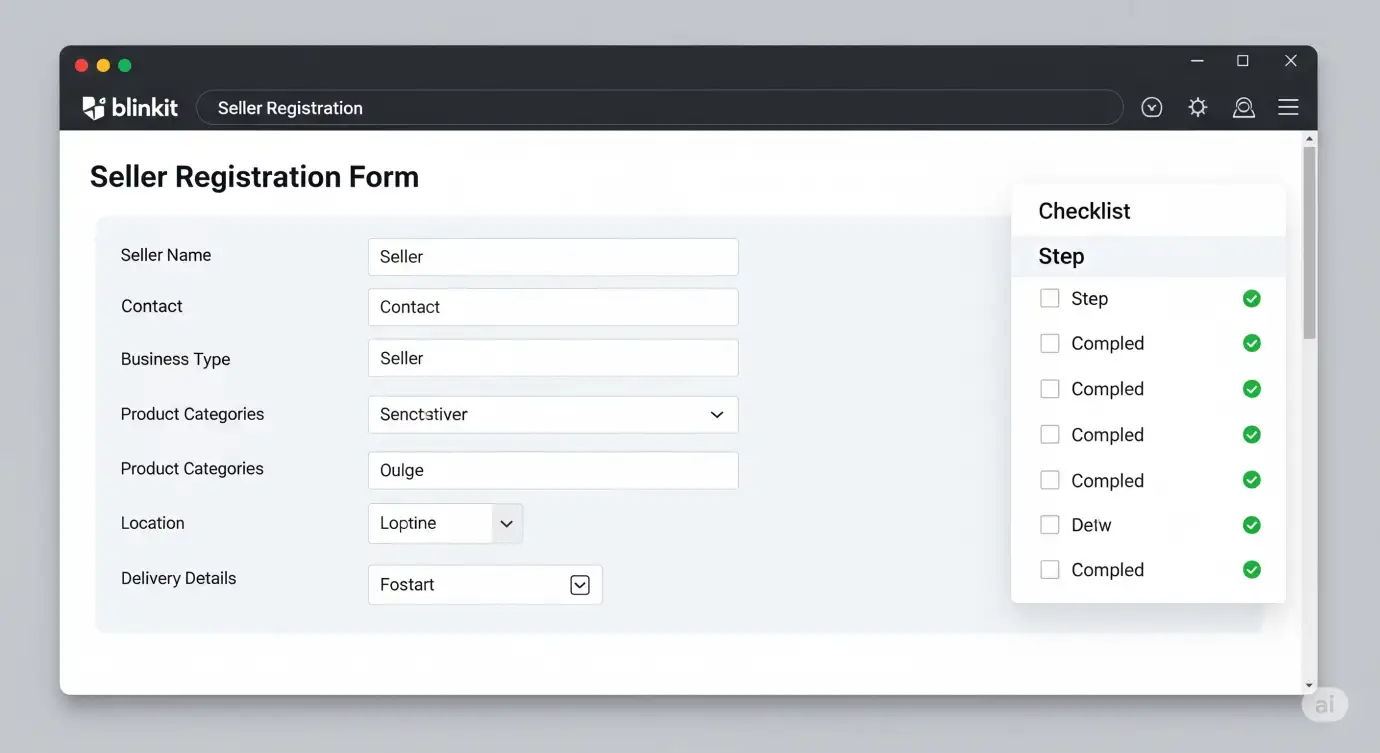
Understanding the initial registration steps is crucial because 70% of seller applications get rejected due to incomplete documentation submitted during the first attempt.
The Blinkit seller registration begins through their official seller portal at seller.blinkit.com. Here's the exact process:
- Step 1: Create your seller account using a valid business email address
- Step 2: Complete the business information form with accurate GSTIN details
- Step 3: Upload required documents (detailed in next section)
- Step 4: Submit application and wait for initial review (typically 3-5 business days)
- Step 5: Respond to any clarification requests promptly
Example: Mumbai-based snack manufacturer "Crispy Delights" completed their registration in just 7 days by preparing all documents beforehand and responding to Blinkit's queries within 24 hours.
Key Takeaway: Prepare all documentation before starting the application to avoid delays. Incomplete applications sit in review queues for weeks.
See also: Blinkit seller fees and commission structure
What Documents Are Required for Blinkit Onboarding?
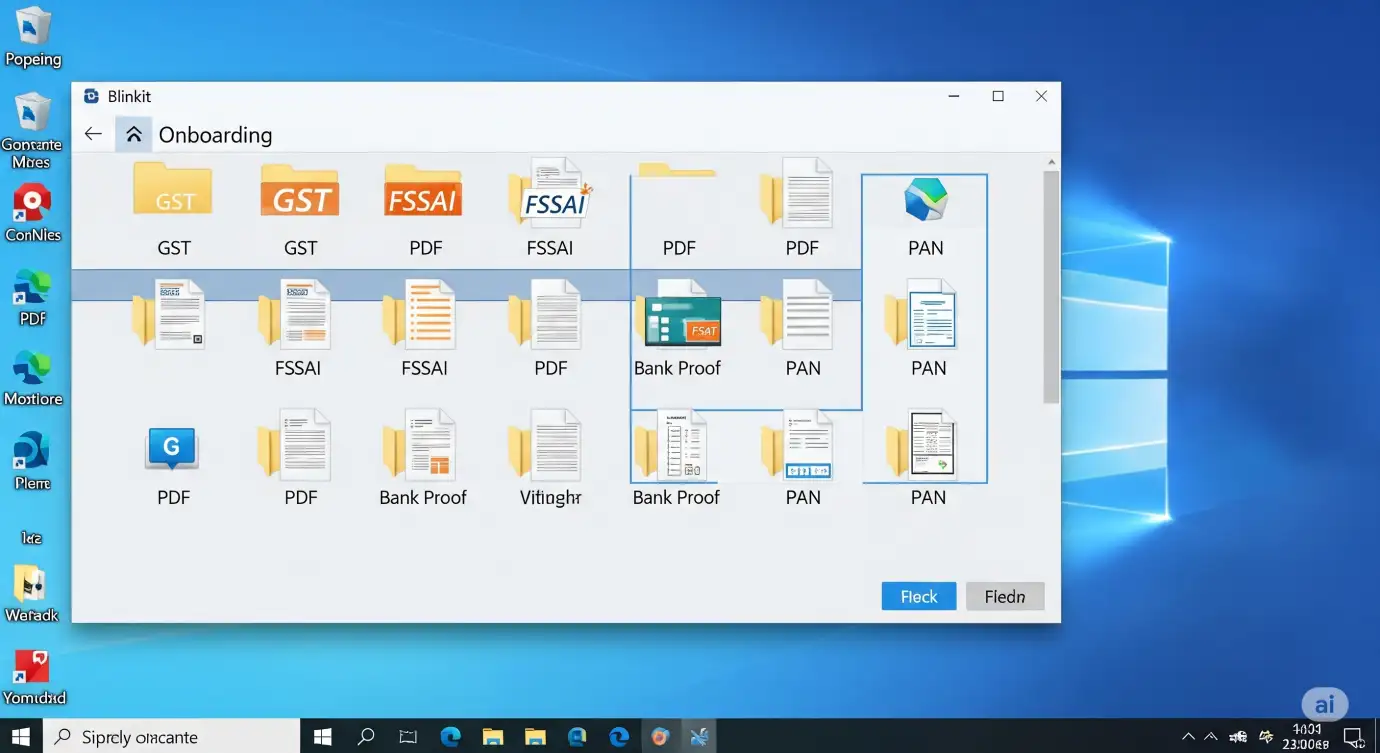
Document preparation is where most sellers stumble because Blinkit requires specific formats and compliance certificates that aren't immediately obvious.
The complete Blinkit seller document checklist includes:
- Business Registration: Certificate of Incorporation, Partnership Deed, or Proprietorship Certificate
- Tax Documents: GSTIN Certificate, PAN Card (business), and latest GST returns
- Banking Details: Current account proof, canceled cheque, and bank statements (last 3 months)
- Product Compliance: FSSAI License (food items), Brand Authorization Letters, and Quality Certificates
- Identity Proof: Aadhaar Card, PAN Card (personal), and recent photographs
Critical Detail: All documents must be in PDF format, under 5MB each, and clearly readable. Blurred or rotated documents cause automatic rejection.
Key Takeaway: Scan documents in high resolution and verify all text is legible before uploading. Keep digital copies organized in a dedicated folder.
Compare: Blinkit vs Zepto document requirements
How Long Does Blinkit Seller Approval Take?
Approval timelines directly impact your time-to-market, and understanding realistic expectations helps you plan inventory and marketing campaigns effectively.
The Blinkit seller approval process typically follows this timeline:
- Days 1-3: Initial document review and compliance check
- Days 4-7: Business verification and background checks
- Days 8-10: Product catalog review and pricing assessment
- Days 11-14: Final approval and account activation
Example: Electronics retailer "TechZone Solutions" received approval in 12 days by maintaining active communication with Blinkit's onboarding team and providing additional product certifications when requested.
Factors that extend approval time include incomplete documentation, GST compliance issues, and product category restrictions in specific pin codes.
Key Takeaway: Plan for a 2-3 week approval window. Use this time to prepare inventory, create product descriptions, and optimize your catalog.
See also: Blinkit seller support contact information
What Are Blinkit's Commission Rates and Fee Structure?

Understanding the complete cost structure is essential for pricing strategy and profitability calculations, as hidden fees can significantly impact your margins.
The Blinkit commission structure varies by product category:
- Groceries & Staples: 15-20% commission on selling price
- Personal Care: 18-25% commission on selling price
- Electronics: 12-18% commission on selling price
- Home & Kitchen: 20-30% commission on selling price
Additional Fees: Payment processing fee (2-3%), logistics fee (₹15-25 per order), and marketing fee (optional, 2-5% of sales).
Example: A ₹500 grocery order would incur approximately ₹75-100 commission, ₹12 payment processing, and ₹20 logistics, totaling ₹107-132 in fees.
Key Takeaway: Factor in 25-35% total fees when setting your selling prices. Build these costs into your pricing strategy from day one.
Compare: Blinkit vs Swiggy Instamart commission rates
How Do I Optimize My Product Listings for Blinkit?
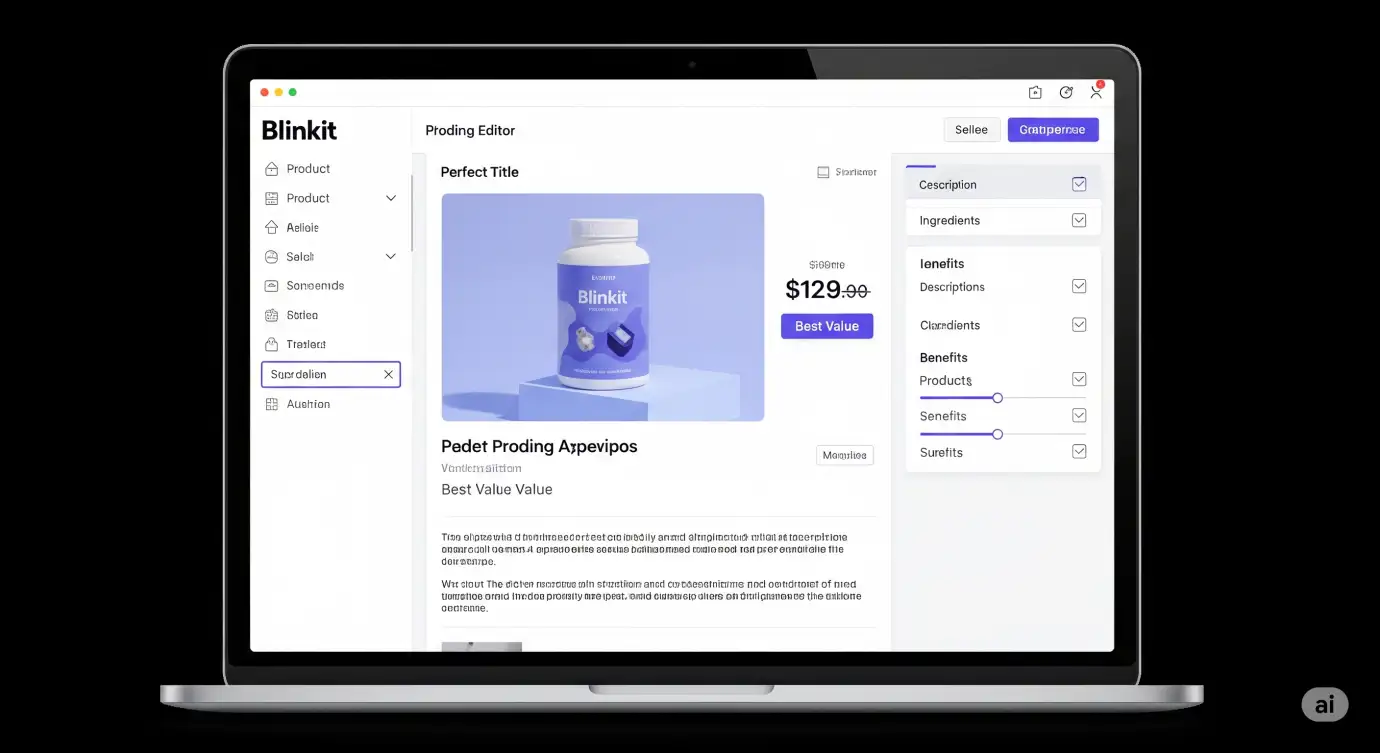
Product listing optimization directly impacts visibility and sales conversion, as Blinkit's search algorithm prioritizes well-optimized listings with complete information.
The Blinkit product listing optimization process includes:
- Title Optimization: Use exact product names with brand, variant, and size
- Image Quality: Upload high-resolution images (minimum 1000x1000 pixels) showing product clearly
- Description Writing: Include key features, ingredients, and usage instructions
- Pricing Strategy: Research competitor prices and maintain competitive positioning
- Inventory Management: Maintain adequate stock levels to avoid delisting
Example: "Organic Basmati Rice 1kg" performs better than "Premium Rice" because it includes specific details customers search for.
Key Takeaway: Invest time in creating detailed, accurate product listings. Well-optimized listings receive 40-60% more visibility in search results.
See also: Blinkit inventory management best practices
Frequently Asked Questions
Q: Can I sell in multiple cities on Blinkit?
A: Yes, but you need separate registrations for each city and must maintain local inventory. Blinkit requires city-specific compliance documentation and local business presence for multi-city operations.
Q: What happens if my product gets rejected during catalog review?
A: Blinkit provides rejection reasons via email. Common issues include pricing problems, image quality, or missing compliance certificates. You can resubmit after addressing the specific concerns mentioned.
Q: How quickly do I receive payments from Blinkit?
A: Payments are processed weekly, typically within 7-10 business days after order completion. Blinkit uses automated payment cycles, and funds are directly transferred to your registered bank account.
Q: Can I modify my commission rates after approval?
A: Commission rates are fixed based on category and cannot be negotiated individually. However, Blinkit occasionally offers promotional rates for new sellers or during special campaigns.
Ready to Scale Your Quick Commerce Business?
Successfully registering on Blinkit is just the beginning. To maximize your quick commerce potential across multiple platforms and optimize your operations, consider partnering with specialists who understand the nuances of rapid delivery marketplaces.
Seller Rocket helps SMB owners navigate complex onboarding processes, optimize product listings, and scale across multiple quick commerce platforms. Our proven strategies have helped over 500+ brands achieve 300% growth in their first year.
Visit www.sellerrocket.in to learn how we can accelerate your quick commerce journey and maximize your ROI across Blinkit, Zepto, and other leading platforms.
Learn More : User-Generated Content for Ecommerce SEO: Converting UGC into Sales